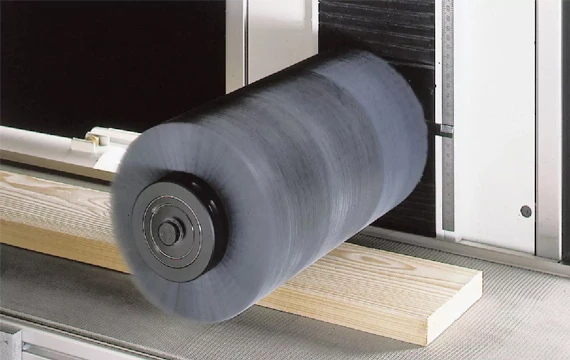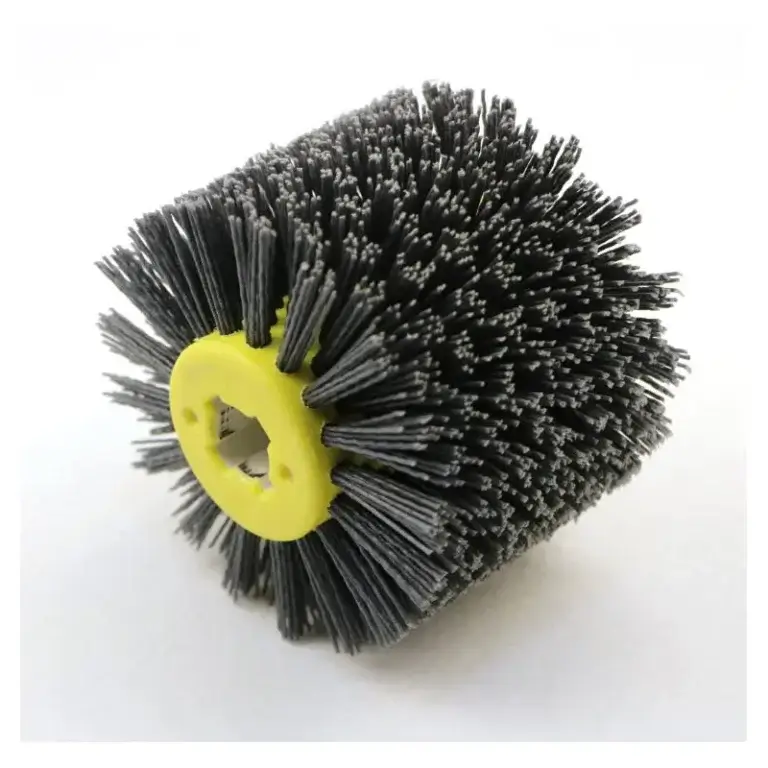
Dull furniture rarely announces what is actually wrong with it. A sideboard that looked warm and deep in a showroom can turn flat and grey in a few years, and the instinct is to reach for another bottle of polish and a cloth. Sometimes that works. Often it does not, because the dullness was never on the surface to begin with, or because the polishing itself has been building a cloudy layer that hides the finish underneath. A furniture polishing brush is a different tool from a cloth, and between a hand-held brush and a cylinder polishing brush, the choice of format matters as much as the polish itself, and understanding what it does is the difference between restoring a finish and masking the problem.
Yes, a furniture polishing brush can bring back your furniture’s shine, but only within specific limits. It works by physically agitating and redistributing the polish, wax, or oil already on the surface, removing the film of dust, fingerprints, and grease that flattens reflected light, and buffing the top layer to a more even sheen. What it cannot do is repair a damaged finish: deep scratches, worn-through lacquer, cracking, water rings, or failing veneer are structural problems, and no amount of brushing will restore a film that is no longer intact.
This guide separates what polishing genuinely accomplishes from what it only appears to accomplish, then covers the variable that most often decides whether the result is a rich luster or a set of fresh scratches, which is bristle stiffness.
What a Furniture Polishing Brush Can and Cannot Do
A furniture polishing brush is a rotary or hand-held tool with bristles that agitate a polishing compound, wax, or oil across a finished wood surface. Its three real functions are removing the surface film of dust and grease that dulls reflection, redistributing existing polish or wax into an even layer rather than a patchy one, and buffing that layer to a uniform sheen. It does not cut, sand, or refinish wood.
The mechanism is worth understanding because it explains the boundary. Bristles work as a large collection of small, flexible elements. As they move across the surface, they carry compound into the texture of the wood, lift loose material out of grain and carving, and generate light friction that warms and spreads the coating. Compared with a cloth, bristles reach into carvings, mouldings, turned legs and grain texture that fabric skips over, and they apply more consistent pressure than a hand can sustain. That is the genuine advantage.
| What polishing can fix? | What polishing cannot fix |
| Dull, hazy surface film | Deep scratches that go through the finish |
| Fingerprints, grease and everyday grime | Worn-through or missing topcoat |
| Uneven, streaky or patchy wax layer | Cracking, crazing or peeling finish |
| Dust settled into grain and carving | Water rings and heat marks |
| Loss of depth on a sound finish | Lifting veneer or loose joints |
| Dullness on an intact factory finish | Damage on bare or unfinished wood |
The distinction that matters most is between gloss and finish. Gloss is an optical property of the topmost surface layer. Finish is the coating itself. Polishing improves how the existing layer reflects light. If the layer is intact but dirty or patchy, polishing restores the look. If the layer is broken or worn, polishing only disguises it briefly, and in the case of worn-through areas, it can make the damage more visible by leaving residue in the exposed wood.
For a broader picture of how surface coatings are classified and what each one tolerates, the general reference on wood finishing provides useful background.
Polishing or Waxing: Which One Brings the Shine Back
Polishing and waxing are not interchangeable, and confusing them is the most common reason furniture care produces disappointing results. Polishing refreshes and cleans an existing finish and adds a short-lived sheen. Waxing applies a thin protective layer that is buffed to a glow and offers limited resistance to moisture and handling. Polish is for maintenance; wax is for protection and depth.
The two products work on different layers. A polish, which may contain oils, mild solvents, or a small amount of wax, cleans lightly and improves appearance on an already sound surface. A paste wax is a coating in its own right: applied thin, allowed to haze, then buffed. Neither product repairs a failing finish, and neither is a substitute for refinishing.
The most useful step is diagnosing the actual condition before choosing a treatment.
| Furniture condition | Correct treatment | Polishing alone will |
| Clean but dull, finish intact | Low-residue polish compatible with the finish | Restore depth and sheen |
| Fingerprints, grease, sticky film | Clean first, then polish | Spread the grime into a new layer |
| Old polish build-up, cloudy appearance | Remove the build-up, then reassess | Make the cloudiness worse |
| Light surface scratch in the finish | Scratch-concealing treatment, not polish | Leave the scratch visible |
| Worn, cracked or peeling finish | Refinishing | Temporarily hide, then emphasise the damage |
| Bare, oiled or unknown finish | Finish-specific oil or conditioner | Risk incompatible residue |
Two rules prevent most mistakes. The first is that cleaning always precedes polishing. Residue trapped under a fresh layer of polish produces exactly the cloudy, streaky appearance that people then try to polish away, which compounds the problem. The second is that polish should be applied sparingly to the cloth or brush rather than poured onto the furniture, then buffed until the surface feels dry. More product does not produce more shine; it produces build-up that attracts dust and gradually obscures the grain.
Bristle Stiffness: The Choice That Decides the Outcome
Bristle stiffness, not brand or bristle colour, determines whether a polishing brush produces a smooth sheen or a scratched surface. A brush that is too stiff applies concentrated force at the tips and marks the finish. A brush that is too soft simply glides over the surface without moving the compound or lifting the film. The correct stiffness is the softest one that still does the work.
Stiffness is a measure of how much force the tips deliver to the surface. Stiff bristles are appropriate for heavy tasks on hard materials: removing thick oxidation, stripping coatings, working on steel. Soft bristles are appropriate where the surface is delicate, and the goal is a fine, uniform finish. Furniture sits at the delicate end of that scale, which is why brushes designed for metalwork or for aggressive rust removal should not be repurposed for a lacquered cabinet. The relationship between bristle stiffness and surface outcome is well documented in industrial finishing practice, and the same principle applies whether the workpiece is a metal component or a dining table.
| Stiffness | Typical filament | Suitable furniture application |
| Very soft | Goat hair, fine wool | Final high-shine pass on delicate or antique finishes |
| Soft | Horsehair, soft nylon | General furniture polishing, varnished and lacquered surfaces |
| Medium | Pig bristle, standard nylon | Grain texture, carvings, moderately soiled surfaces |
| Medium-hard | Brass wire, stiff nylon | Not for finished furniture; bare metal components only |
| Hard | Steel wire | Not for furniture; will destroy a wood finish |
Test on an inconspicuous area before committing. The underside of a tabletop, the inside of a cabinet door, or the back of a leg will reveal in seconds whether the brush is marking the finish, and the cost of that test is negligible compared with the cost of discovering it on a dining table.
The Four Factors That Set Actual Stiffness
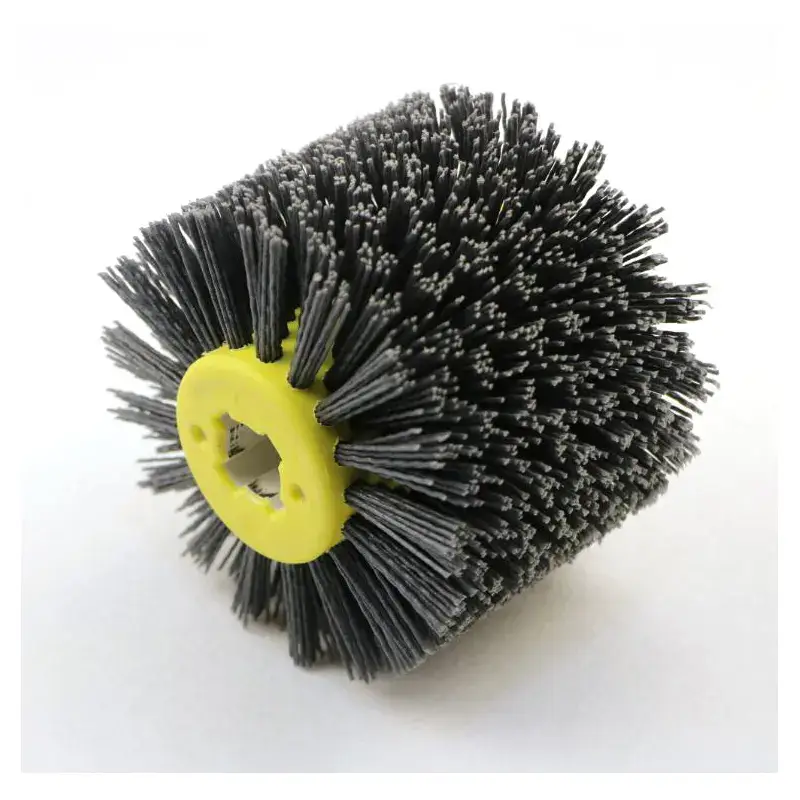
Bristle stiffness is not a single property. It is the combined result of four variables, and changing any one of them changes the working behaviour of the brush.
- Filament material. Natural fibers vary widely. Horsehair has a natural taper at the tip, which spreads contact over a small area rather than a point and reduces marking, and it absorbs vibration rather than transferring it to the surface. Pig bristle is stiffer and more resilient. Palm and agave-type plant fibers offer moderate stiffness with good compound retention, and they absorb liquids well, which suits applying oils and waxes. Nylon is durable, resistant to moisture and chemicals, easy to clean, and consistent between batches. Abrasive-loaded nylon contains embedded particles and cuts rather than buffs, so it belongs to a sanding stage, not a polishing one.
- Filament diameter. Stiffness rises steeply as diameter increases, following the same principle as a cantilever beam, in which deflection resistance scales with the fourth power of the section diameter. A filament of twice the thickness is far more than twice as stiff. This is why two brushes with the same bristle material and the same length can behave completely differently, and why diameter is the single most consequential specification after material. The underlying relationship is described in standard references on beam theory.
- Filament length. Longer unsupported filament bends more freely and delivers lower pressure, which helps it conform to irregularities and reach into carvings. Shorter filament behaves as a stiffer element and presses harder. For furniture, longer filament is generally preferable because it conforms to mouldings and turned surfaces without concentrating force.
- Fill density. Higher density puts more bristles in contact, which increases scrubbing action but also restricts the flow of compound and traps debris. Lower density is gentler and harder wearing on delicate surfaces. For polishing, medium density is the usual compromise: enough contact to work the compound, enough openness to shed dust.
Matching Bristle Material to the Finish
The finish on the furniture constrains the material as much as the wood species does.
- Varnished, lacquered, and polyurethane finishes are the most tolerant. They are sealed films that can accept soft to medium nylon or natural bristle without damage, provided the bristles are clean and free of embedded grit.
- Shellac and French-polished surfaces are softer and more sensitive to both solvents and abrasion. Very soft natural bristle is appropriate, and pressure should be minimal.
- Oil-finished wood should be maintained with the oil or conditioner specified for that finish. Adding wax over an oil finish, or oil over a wax finish, degrades both and produces a surface that attracts dust.
- Waxed furniture should continue with a compatible wax rather than layering an unrelated spray polish over it.
- Painted wood should be cleaned gently and not polished unless the manufacturer approves it.
- Bare or unfinished wood should not be treated with general-purpose polish at all.
One further precaution applies regardless of finish: keep separate brushes for separate materials. A brush that has been used with a metal polishing compound carries abrasive residue that will scratch a softer surface. Labelling brushes by purpose costs nothing and prevents the most avoidable form of damage.
Match the Brush to the Wood and the Finish
Wood hardness determines how much friction the surface can absorb before it marks, and it varies enormously between species. A brushing routine that produces a rich sheen on dense oak can leave visible tracks on soft pine, because pine fibres compress under the same pressure. Match the pressure and bristle stiffness to the species, not to a single routine.
Janka hardness is the standard measure of a wood’s resistance to denting, expressed in pounds-force. It is a useful shortcut for anticipating how a species will respond to friction. For the underlying test method and its limits as a predictor of real performance, the reference material on the Janka hardness test is worth reading alongside any supplier’s data.
| Species | Janka hardness (lbf) | Polishing consideration |
| Pine | approx. 380 | Soft; resin pockets can gum the brush; use light pressure |
| Cherry | approx. 950 | Blotches if unevenly treated; work in small sections |
| Walnut | approx. 1,010 | Open pores; benefits from medium density to work compound in |
| Teak | approx. 1,070 | Naturally oily; wipe with solvent before finishing; resists adhesion |
| Red oak | approx. 1,290 | Durable; open grain holds compound well; watch for scratch visibility |
| White oak | approx. 1,360 | Durable and water-resistant; tolerant of firmer bristle |
| Hard maple | approx. 1,450 | Dense and tight-grained; shows swirl marks readily; use clean, soft bristle |
Hardness values vary by source and by individual sample, so treat them as guidance rather than specification, but the ordering is reliable, and the practical implications follow from it. Soft species need lower pressure and softer bristle; dense species tolerate firmer bristle and can be worked more briskly.
Two surface conditions cut across species. The first is oily wood such as teak, where natural oils interfere with adhesion and cure, so the surface should be wiped with a solvent before any finish is applied. The second is raised grain, which occurs when moisture lifts wood fibres during cleaning. A wood brush used before the surface is fully dry will push those fibres around rather than polish them flat.
For detailed species data including hardness values and finishing behaviour, a wood species reference is more reliable than general advice, because the same species name can cover material with noticeably different properties depending on origin and growth conditions.
Brush Format and How to Use It Correctly
The brush format determines access, contact area, and control. Flat surfaces, edges, carvings, and turned components each need a different shape, and using one format for everything is the most common reason polishing produces uneven results.
Choosing the Format
| Format | Best for | Notes |
| Hand-held brush | Delicate pieces, antiques, precision control | No power source; least risk of marking |
| Wheel brush | Broad flat surfaces, long edges, curved exteriors | Most versatile powered format |
| Cup brush | Concave and curved surfaces, bowl shapes | Larger contact area on curved work |
| Disc or plate brush | Large flat panels | Even coverage across wide areas |
| Pen or end brush | Carvings, grooves, recesses, mouldings | Reaches details other formats cannot |
| Roller brush | Flat panels and production finishing | Uniform pressure across the full width |
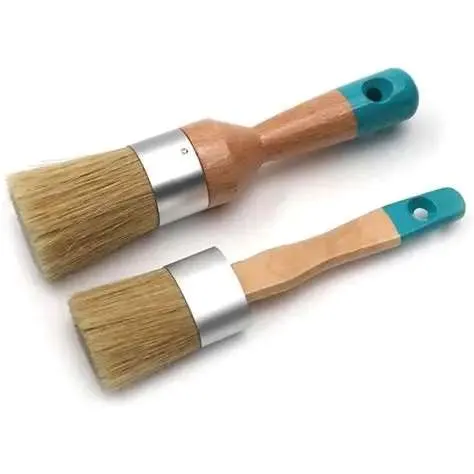
For furniture, a hand-held brush is often the right answer regardless of what powered options exist, because control matters more than speed. Where a powered tool is used, the format should follow the geometry: wheel for open surfaces, cup for curves, pen for detail.
Technique: Speed, Pressure and Direction
Three operating variables determine the result more than the tool does.
Direction. Work along the grain. Bristle tracks left across the grain catch light differently from the surrounding surface and become visible as soon as the piece is in raking light. Where the grain direction changes, as it does on mouldings and table aprons, follow it as it turns.
Speed. Higher speed generates frictional heat, and heat is the enemy of a good finish: it can soften wax, dull a gloss, and, on thin or delicate finishes, cause visible damage. Run powered brushes at the low end of their range and increase only if the compound is not being worked effectively. There is no benefit to speed beyond the point where the compound distributes evenly.
Pressure. Use the weight of the tool, not additional force. Pressing harder does not polish faster. It splays the bristles, reduces the effective contact area, concentrates load at the tips, and accelerates both brush wear and surface marking. The same principle applies to hand-held brushes: let the bristles do the work.
Compound application. Apply the compound to the brush rather than directly onto the furniture. This distributes it evenly, prevents localised build-up, and avoids saturating the grain in one spot. Work in small sections, and buff off excess before it dries unevenly.
Maintenance and When to Replace the Brush
A polishing brush works only as well as it is clean. Residue from compound, wax, and dust builds up between the bristles, reduces their flex, and eventually transfers old compound onto the next surface. Clean the brush after each use with a brush comb or rake, and store it so the bristles are not deformed.
The routine is short. Remove debris from the bristle bed by working a rake or stiff comb through the filaments, which restores them to an open, fluffy state. Wash natural bristle only when necessary and avoid prolonged soaking, which damages the filaments and, in natural hair, encourages mould. Store brushes dry and dust-free, with the bristles neither compressed nor resting under load; horizontal storage suits most formats.
Replace the brush on condition rather than on a calendar, and inspect before each use.
| Indicator | Meaning |
| Bristles permanently flattened or matted | Cannot spring back; contact pressure is no longer reliable |
| Splayed beyond the original diameter | Filament damaged; coverage and pressure are inconsistent |
| Visible uneven wear across the face | Balance or alignment problem; will produce streaky results |
| Noticeably softer than when new | Thermal or chemical degradation of the filament |
| Bristle loss during use | End of service life; shedding can embed fibres in the finish |
| No visible improvement in gloss | Either the brush is spent, or the problem is the finish, not the process |
That last row is the most useful diagnostic. If a clean, undamaged brush with the correct stiffness and a compatible compound produces no improvement, the finish itself is the limiting factor, and no amount of further polishing will resolve it. At that point, the honest options are to accept the patina, treat the specific defect, or refinish.
FAQS
Can a polishing brush remove scratches from furniture?
No, not in the sense most people mean. Light surface scratches that sit in the top coat can sometimes be reduced or concealed by a dedicated scratch-concealing product, and gentle polishing may soften their appearance by levelling the surrounding finish. Scratches that have cut through the finish into the wood cannot be polished out; they require sanding, filling, or a spot repair, and polishing over them will only leave residue sitting in the scratch and make it more visible.
Should I polish furniture that has an oil finish?
Only with the oil or conditioner intended for that finish. Oil-finished wood and waxed wood require different maintenance systems, and mixing them is counterproductive: wax applied over an oil finish, or oil applied over wax, degrades both materials and creates a surface that holds dust. General-purpose polishes, particularly those containing silicone, are a poor choice for oiled pieces because silicone is difficult to remove and interferes with future re-oiling.
How often should furniture be polished?
Polish when the piece needs it, not on a fixed schedule. Clean and dust routinely, and polish only when a clean surface still looks dull or uneven. Over-polishing is a genuine problem: repeated layers of polish and wax build up into a cloudy film that obscures the grain, attracts dust, and eventually has to be stripped before the furniture can be properly maintained again. For most household furniture, occasional polishing with careful dusting in between is both sufficient and safer for the finish.