There is a specific kind of frustration that only a woodworker understands—the moment you realize your beautifully carved cabinet door has a dozen tiny “fuzzies” in the deepest grooves, and your standard sanding block is about as useful as a brick. It is in these moments of technical despair that the Sandpaper Brush emerges as something of a minor miracle.
One might look at it and see a strange, fringed creature that doesn’t quite know if it wants to be a brush or a piece of sandpaper. But that’s exactly the point. It is a hybrid, a tool born of the necessity to smooth surfaces that aren’t flat, shouldn’t be flat, and would be ruined if they ever became flat.
The Core Concept: Not Your Average Abrasive
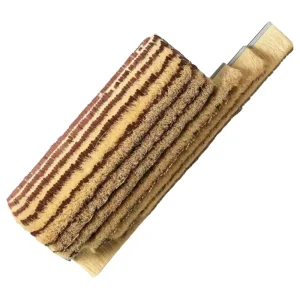
When we talk about a Sandpaper Brush, we aren’t talking about a single static tool. It is an umbrella term for a variety of abrasive systems that use flexible “fingers” of sandpaper—often backed by natural or synthetic bristles—to reach into the contours of a workpiece.
Unlike a traditional orbital sander, which relies on a flat plane of contact, the Sandpaper Brush relies on “slap” and “contour.” As the tool spins, the abrasive strips are pushed into the low spots of the wood by the supporting bristles. It’s a bit like thousands of tiny, very fast hands sanding your project simultaneously. It’s effective, it’s efficient, and frankly, it saves a tremendous amount of skin on one’s fingertips.
Why the Bristle Support Matters
It’s often observed that the bristles aren’t just there for decoration. They act as a cushion. Without the bristles, the sandpaper strips would just fly wildly, likely snapping off or leaving deep, aggressive scratches. The bristles—sometimes made of Tampico or horsehair—provide the “backbone” that forces the abrasive to follow the shape of the moulding or the curve of a chair leg.
From Benchtop to Factory: The Different Forms
Depending on whether you are a weekend hobbyist or running a high-volume production line, the “brush” you use will look very different.
The Handheld Sandpaper Brush
For the average person working in a garage, this is often a small attachment for a drill or a dedicated handheld motor. It’s the go-to tool for a quick Furniture Polishing Brush session where you just need to knock down the grain after a coat of sealer. It’s portable, it’s tactile, and it gives you a lot of control over how much material you’re removing.
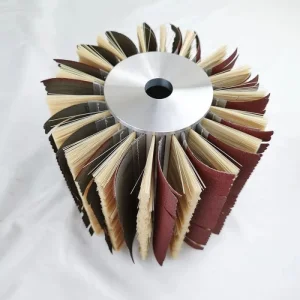
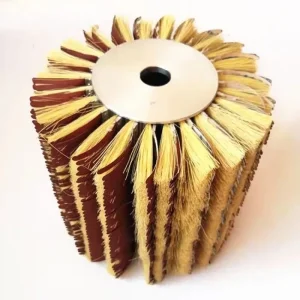
The Cylinder Polishing Brush (The Heavy Hitter)
Now, if you step into a commercial flooring or cabinetry plant, the scale changes. Here, you’ll find the cylinder polishing brush. These are massive rollers, sometimes several feet wide, fitted with abrasive inserts.
One might notice that in industrial settings, consistency is the ultimate goal. A cylinder polishing brush ensures that the first board off the line looks exactly like the ten-thousandth board. It’s a mechanical perfection that hand-sanding simply cannot replicate. These machines often have variable speed controls, because if you spin a Sandpaper Brush too fast, you risk burning the wood; too slow, and you’re just wasting electricity.
The Role of the Sisal Cylinder Brush

In the context of prep work, the sisal cylinder brush often works in tandem with abrasive systems. While not a “sandpaper” brush in the literal sense of having paper strips, it serves a similar purpose in texturing. Sisal is incredibly tough—almost abrasive in its own right—and is often used to “open” the pores of the wood before the actual sanding brushes do their work. It’s a layered approach to surface preparation.
Technical Specifications: Choosing Your Grit and Style
Picking a Sandpaper Brush isn’t just about grabbing the first one you see. You have to match the tool to the timber and the desired outcome.